Wednesday, October 27, 2010

SKRUMMY OLIVES


It was my turn to host the book-club evening a couple of weeks ago (there was another birthday cake involved, will blog about that later!!).  These evenings are always relaxed and casual - no fuss allowed!! - but you know me - I have to add a few home made touches!

I made my usual spiced nuts and they went down really well with this newest addition to my repertoire, these olives were a revelation, incredibly easy and they taste wonderful, the combination of olives, lemons, chilli and garlic, works really well.


I know I shouldn't use the "C" word, but I just have to - a jar of these olives would make a fantastic Christmas gift.  Arrive with a jar of these beauties and you will be welcome at any party, meal, shindig ... you name it, you'll be welcomed with open arms!!

Skrummy Olives
adapted from Lotte's Country Kitchen (Lotte Duncan)

400g              olives (I used black pitted and green stuffed with garlic)
2                    cloves of garlic, grated or minced
1                    lemon, zested and juiced
1 tbsp             chilli sauce (I used Frank's because I am addicted to it!!)
1 tbsp             chopped basil
1                    chilli - seeded and chopped
1 tbsp             olive oil


Drain and rinse the olives. (Olives without stones are best as they soak up the marinade like a sponge!)
In a bowl mix them with all the other ingredients.
Spoon back into some jars.
Although you can serve immediately they are best after a day or two.
Store in the fridge, they will keep for weeks and weeks.

Sit back and wait for the praise!!


Saturday, October 23, 2010

CHOCOLATE CAKE - ANOTHER LEVEL


Man oh Man - this is a good one!!  A deep dense delicious chocolate cake, with a fantastic contrast in texture, I actually think that this cake has it all.  Everything in the taste department, really interesting (in a good way) texture and easy to make (although it does take more time than usual, most of it for cooling though).

Ottolenghi, The Cookbook has been on my "wishlist" for a very long time, and my only regret is that I didn't move it to my basket much, much sooner!!!  It's a wonderful book that will really come into it's own during the summer - it's chock full of fantastic salads, but there is also plenty in there to keep me happy for the autumn and winter.

It was Brownieville Boy#1's birthday recently and something special was called for, it had to be chocolate and it had to be delicious!  I thought this Ottolenghi Fudge Cake sounded really interesting because the batter is cooked in two stages, you cook 2/3rd of it - allow to cool and then add the rest and bake again.  I was under a bit of time pressure (what's new!) and didn't allow the cake to cool completely between the first and second baking and therefore didn't have as defined a contrast between the two layers as I would have wished, but even despite my impatience it was wonderful.  They actually say that the whole cake can be baked in one go if you wish - but you would really miss out if you did this.  This is my simplified version:


Chocolate Fudge Cake

240g           butter (in small cubes)
300g           dark chocolate (about 50%)
60g             dark chocolate (about 80%)
290g           light brown sugar
4 tbsp         water
5                 large eggs - separated
pinch of salt

Preheat oven to 170 C
Line a 23cm springform tin with parchment (or butter and flour it)

Melt the sugar and water in a small pan and bring to the boil.
Place the butter and chocolate (which you have broken into small pieces) in a large bowl.
Pour the syrup over the butter and chocolate and stir well until totally melted.
Stir in the egg yolks one by one, combine well between each addition.
Whisk the egg whites with a tiny pinch of salt to a firm, frothy (but not dry) meringue.
Fold the egg whites into the chocolate mixture as gently as possible.
Pour 2/3 of the mixture into the prepared tin and bake for about 40 minutes, until a skewer comes out fairly clean.
Remove to a wire rack and cool completely - this takes a couple of hours.
Pour the rest of the mixture over the cooked cake, level with a palette knife.
Bake for 20 - 25 minutes.  The top should have a brownie like moistness.
Leave to cool completely in the tin on a wire rack.

Enjoy!

Wednesday, October 20, 2010

MY PRECIOUS PUMPKIN!!!


I really enjoy Katie's blog Apple and Spice and have loved following her adventures with the Cake Slice baking group.  I decided to sign up when she mentioned that the group would be starting a new book in October and were open for new membership.  The book is Cake Keeper Cakes by Lauren Chattman, and I'm really looking forward to baking my way through it.


That said my heart sank a little when I read that the first months cake was Pumpkin-Chocolate Chip Pound Cake.  Why you might (reasonably) ask?  I have plenty of history with vegetable based cakes - I could be described as (an almost .... well perhaps an actual) chocolate fiend, where could the problem be??  Well, the problem was with the pumpkin, you see it is incredibly difficult to get canned pumpkin here, and I had managed to source a can earlier in the year (in Harvey Nicks if you don't mind!!!) and was guarding it fiercely for Halloween, I have read so many wonderful pumpkin pie recipes on American blogs that I had been looking forward to choosing my favourite and giving it a go.

A good friend and fellow book-club member had sneaked a significant birthday past us (very bold!!) but her sister let the cat out of the bag, so T and I decided that we should convert a scheduled coffee morning into a Birthday celebration - and what better occasion to use my precious pumpkin!!


The cake went down so well that I nearly didn't manage to get a photo of it sliced!!  It tasted beautifully moist, with a very pleasant light spicy back note that combined well with the chocolate, nuts and of course the pumpkin. 


The precious (!) canned pumpkin - fresh cooked pumpkin just doesn't have the correct texture (too wet!).


Pumpkin-Chocolate Chip Pound Cake


1 3/4             cups flour
1 tsp              baking powder
1 tsp              bread (bicarbonate of ) soda
1 tsp              ground cinnamon ( I ground my own because I had run out of the ground stuff!!!!)
1/2 tsp           salt
1/4 tsp           ground cloves (thankfully I had these!!)
pinch             nutmeg (I grated this!)
4 oz/110g      soft butter
1 1/4             cups sugar (I used soft brown muscavado)
3                    large eggs
1 cup             canned pumpkin puree
1 tsp              vanilla extract
1/3                cup milk
1                   cup dark chocolate chips (I chopped up a bar of Lindt 85%)
1                   cup walnuts (reserve some for the top then chop the rest)


Preheat oven to 180 C/350 F
Line a 19 cm round tin with parchment paper
(the original recipe is for a loaf tin but I think round is more celebratory)

Sift the flour, baking powder, bread soda, spices and salt together  into a large bowl.
Cream the butter and sugar together with an electric mixer until light and fluffy.
Add the eggs one at a time at a medium speed, be sure to scrape down the sides while mixing.
Stir in the pumpkin puree, vanilla and milk.
Stir the flour in gradually and gently.
Add the chocolate chips and chopped walnuts - combine well.
Pour the batter into the prepared tin.
Bake for approx 50 minutes until a skewer comes out clean.
Allow to cool in its tin on a wire rack for 10 minutes.
Then place on the wire rack and cool completely.


Thursday, October 14, 2010

MOVE OVER COCOA POPS!!!


During the school/work week I normally prepare a hot breakfast for my darlings (!) but I feel weekends are about R&R and cooked breakfasts are not an option (other than the odd lazy brunch).  Son #2 has recently joined a new soccer team that can require quite early Sunday morning starts, and I wanted to have something nutritious and filling available (which would still allow me/us to milk every last second of lie-in time!!!).

Brownieville Boy (!?!) has a slight massive chocolate addiction, so I reckoned that if I sneaked some healthy ingredients in with some chocolate I'd be onto a winner!!  Then when I saw that this month's We Should Cocoa Challenge was to prepare something with both chocolate and hazelnuts, I clicked !  What would a cocoa and hazelnut granola taste like????  What about making a granola, chock full of healthy seeds and nuts, flavouring it with cocoa and then adding some small chocolate chunks? He'd have his chocolate hit, and also the slow release carbs to fuel his exploits on the pitch.  Would I create the next (much better looking!!) Wayne Rooney? Would it taste good?  Will Trappatoni (Irish Football Manager) come calling???

The granola is actually really good - I have made a couple of batches, and have discovered that if I make it minus chocolate chunks Brownieville Man (!) loves it too.  The cocoa gives a subtle background flavour that really works well at breakfast time - he actually prefers it to my more normal cinnamon version.  RESULT!!!


Cocoa and Hazelnut Granola


300g                      porridge oats
2 heaped tbsp        pumpkin seeds
2 heaped tbsp        sesame seeds
2 heaped tbsp        linseeds
2 heaped tbsp        sunflower seeds
1 heaped tbsp        cocoa (sifted)
2 heaped tbsp        soft brown sugar
100ml                    honey/maple syrup
150g                      toasted hazelnuts (or just plain if you don't mind the skin)
1 tbsp                    rapeseed/sunflower oil
75g                        good dark chocolate - chopped small (optional)

Preheat oven to 150 C

Pour all the ingredients (except chocolate) into a baking tray and bake for about 30 minutes, stirring regularly after 10 minutes.  Ovens vary greatly, it could be ready after 20 minutes (you'll know when the oats begin to colour and the nuts release their beautiful smell).
Allow to cool completely. 
Add chocolate pieces if using.
Store in a pretty jar (if you're into that type of thing!!)


I'll let you know about all offers for the sporting big time!

Friday, October 8, 2010

AUTUMNAL BOUNTY


Season of mists and mellow fruitfulness - been dying to use that line!!!!  But seriously Autumn really is an incredibly fruitful season, particularly when it comes to foraging for free food.  Although I was thinking that if you were counting man hours, and were charging yourself minimum wage this "free food" would be quite expensive!!

I have spent many hours devising a list of to do's for foraging the hedgerows, this is my considered offering!

1.  Do not go blackberry picking wearing your MBT's, you will be unbalanced and unable to reach as far for those elusive big fat juicy ones.

2.  Do not wear your new MBT's as you could head into a big pile of muck while reaching for a huge bunch of elderberries and totally ruin those shoes.

3.  Do not go blackberry picking when you have a hand modeling audition (not that I actually had an audition, but wouldn't be a good idea if you had!!!!!)


4.  This is probably the most important one .... After blackberry picking, do not under any circumstances visit a friend  in hospital and use the alcohol wash at the entrance ..... you will be very, very sorry if you do. (and embarrassed for whelping in pain when there are actual sick people round about!!)

5.  Wear heavy jeans, not a light pair of tracksuit bottoms - those nettles hurt!!


         My first days blackberry picking resulted in a large blackberry and apple tart, which went down really well ...... so well in fact that about twenty minutes after I photographed and served the tart -


 This is all that remained!!!!!  Well this empty dish and three very guilty looking people!


I also picked some rose hips, and having read on the internet that rose-hip syrup is absolutely magic stuff when it comes to attacking colds and flus I made a vat of the stuff! -  I gave it to son #2 last weekend when he showed flu like symptoms, he still missed school this week, so I won't be marketing my syrup any time soon!!


My next day's foraging yielded a huge bag of blackberries and some damsons and plums.  These blackberries ended up in a bottle of vodka - Nigella's blackberry vodka to be exact (I'll let you know how that turns out at Christmas) and a Blackberry and Lime Cake,  this cake is based on Sally's Lemon Butter Cake which I put on my "to try" list , then I read about it again on the wonderful Tea and Wheaten Bread blog Here (this post pushed it well up the list!!) and then I read EmmCee's enthusiastic Yum, Yum Post and I made it that day.  Sally's original cake was flavoured with just Lemon, but I wanted to use my (hard won) blackberries and I thought that Lime would be a good combination, and I was right, I can only quote Emmcee "Yum Yum"!!

I have (as usual) made some changes - this is how I liked it, but please look to to the other versions and choose your favourite.


Blackberry and Lime Cake

250g       butter
200g       soft brown sugar
250g       self raising flour
3             eggs, beaten
               blackberries - enough to carpet over the mixture
1             lime, zest for the cake and juice for the drizzle*
50g         icing or caster sugar for the drizzle

Preheat oven to 180 C
Line a 24x33cm (13x9 1/2") deepish tin with parchment paper

Melt the butter in a large pan.
Add the sugar, combine well.
Add the flour followed by the eggs and the lime zest.
Pour half the mixture into the tin and spread out as evenly as possible.
Sprinkle the berries over the mix and then spread the rest of the cake mix over the berries.
Bake for 20 to 30 minutes.

When the cake is cooked (skewer comes out clean) throw together the drizzle, by just mixing the lime juice with the 50g sugar.  Pour this over the hot cake (I used a pastry brush to get it everywhere)
Cool on a wire rack.

*I also made this cake with orange zest and juice, also wonderful, but I think the lime has the edge.


The queen of  foraging would have to be Darena Allen, and I have been turning to her book Forgotten Skills of Cooking with each new fruit collected.  I used her Raspberry, Boysenberry, Tayberry or Loganberry Jam recipe to make some Blackberry Jam (I know!!) Yet again I have changed the recipe, but I think it turned out very well!

Blackberry Jam

900g  (2lbs)           blackberries
450g  (1 lb)           sugar
450g  (1 lb)           jam (preserving) sugar
1                            lemon

Sterilise your jars by washing thoroughly (I pop mine in the dishwasher) and then heating at 150 C for at least 15 minutes.

Pour the sugar into an ovenproof dish and heat gently in the oven with the jars (same heat, same time).
Put the berries into a large wide stainless steel pot, mash and then heat for about 4 minutes until the juices begin to run.
Add the lemon juice and zest. 
Add the warmed sugar and stir over a low heat until fully dissolved.
Raise the heat to bring to the boil and cook steadily for 5 minutes, stirring constantly.

Test if the jam is set by putting a small blob on a plate you have had in the freezer,
Press the jam with your finger, if it wrinkles it is set.

Remove from the heat, skim and then pour into your sterilised jars.
Cover immediately.


Also made a blackberry and apple crumble.


And jars and jars of apple and elderberry jelly (word of advice - buy a proper jelly maker stand thingy, and don't try the upturned stool method, I spent hours cleaning up apple and elderberry juice!!!!)

Also made some damson, plum and apple jam, and some blackberry vinegar.

This weekend's project is some sloe gin .... can't wait for Christmas!!

Saturday, October 2, 2010

BILL GRANGER'S HOLIDAY


On the now defunct forum  Nigella.com, they had a cookbook review each month, I have to say that none of the books selected really grabbed my attention until Jutta chose Holiday by Bill Granger - it was a book that I had owned for a while but hadn't used, and I will be forever grateful to her as I have found winner after winner in this book, actually out of all the recipes I tried (and there were many!!) there was only one that we weren't mad about - not bad going.  The review has carried onto the replacement forum Through The Oven Door, which is a wonderful alternative set up by Jutta among others. (Although that said I'm having problems with it at the moment - I'm blaming all the new spyware we have installed!).

Place of honour goes to this cherry tart which beside tasting excellent has the easiest pastry of all time - no rolling out needed (yahaa!!!), I'm going to be using this time and time again. (recipe below)


 The Green Ratatouille, with some obvious replacements!!!  I'm not a big fan of green peppers, and I happened to have yellow courgettes (zucchini) in the house, it was a lovely vegetable dish pretty and tasty - works for me!!


 Crispy Skinned Salmon with Tamarind Caramel Dressing, the tamarind was a revelation to me, I have had some in the cupboard for some time and hadn't gotten round to trying it - boy am I glad that attempting this recipe introduced me to this wonderful flavour - a subtle bitterness, that doesn't cause the "sour lemon" face (!!) but still has that sour hit - I used the leftover dressing in a bowl of rice the next day (strange but delicious!)


This is the Never-Fail Birthday Chocolate Cake, before I added the Chocolate Icing, without doubt the least successful of all the recipes I attempted, its biggest failing was that there wasn't nearly enough chocolate in it - a "mortler" in my book!!  (A "mortler" being our childhood term for mortal sin, ie. a biggie!!!)


 Sweet Potato with Coriander and Preserved Lemons, an unusual combination I know but it really works.  The left overs were wonderful in soup. 


 A pretty awful picture, but this Leg of Lamb with Indian Flavours was as far from awful as you could get!!  A delicious combination of flavours served with the sweet potatoes (above) and the turmeric potatoes (below).


We're Irish, we eat potatoes by the sackful!!!  Any new ideas for potatoes are always welcome, this one particularly - it tastes great and with turmeric being sooo good for you, they are actually health food!!


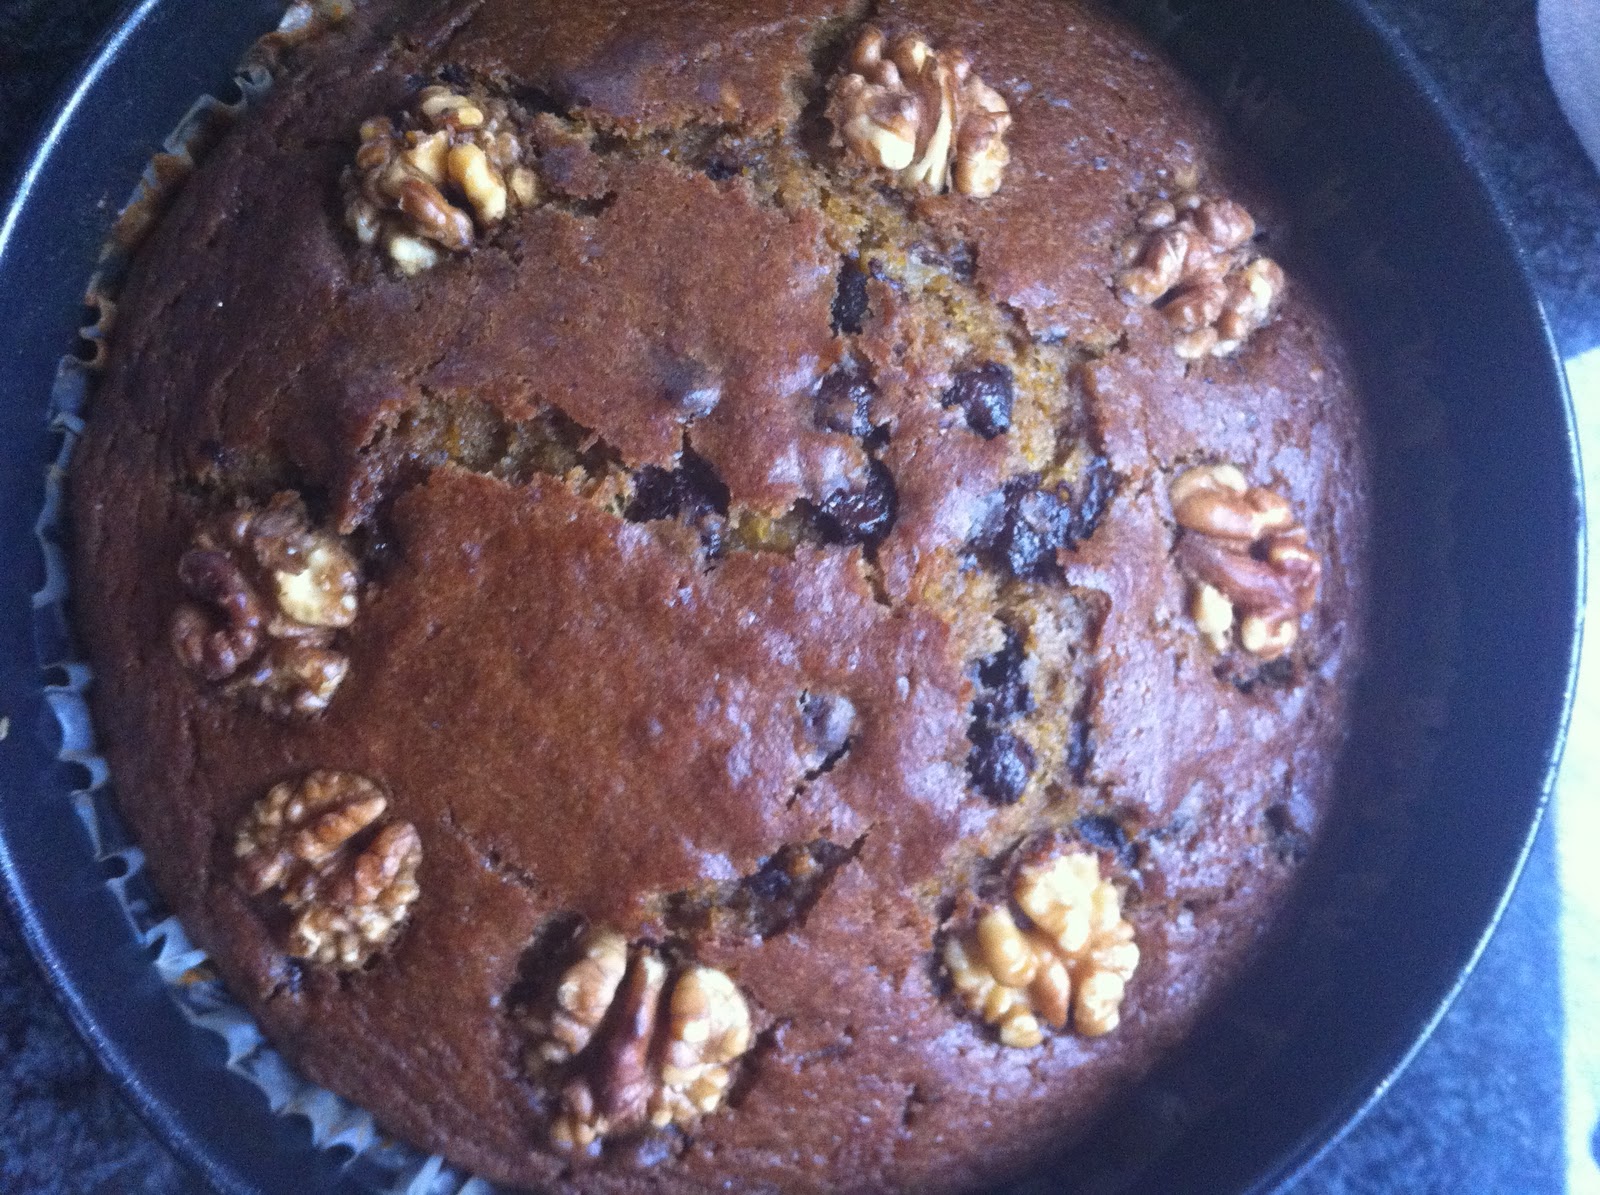
 Flourless Chocolate and Hazelnut Cake, this is the cake to give as a gift to someone diagnosed with gluten intolerance - it will make them feel a whole lot better about a life without flour!!  The cake was moist and full of nutty chocolaty flavours, it went down really well when I served it to visiting relatives, worked well with all ages.


 Bills Garlic Mushrooms were probably nothing you wouldn't do anyway (I get really annoyed with cookery books that contain really obvious recipes - ham sandwich anyone? - you know the sort of recipes I mean!!!) he just added some chili to the usual mushrooms, olive oil, garlic, salt and pepper.  To give him his due these excessively easy recipes were few and far between.


 The Roast Chicken with Coriander Chili Stuffing and Coconut Gravy, was a real departure from the norm for me, and it was a welcome change - although it in no way replaces my usual roast chicken with lemon and garlic in my affections!!  As you can imagine chicken stuffed (under the skin) with chili, coconut, coriander, ginger, lime and sugar is jam packed with flavour and it really works.  This dish made for wonderful leftovers - I heated up the leftover chicken meat in the coconut gravy, added this to pasta - mighty good I have to say!!!


 Chocolate Chip Ice Cream, it was great to try out my new ice-cream maker with this recipe, although nice it didn't reach the dizzy heights of the Raspberry Yoghurt Ice Cream - that said it was demolished in no time!


How pretty is this dish??  Poached Salmon and Risoni Salad was really tasty (and would be a great way to use up leftover salmon) I used some chard (from the veg box) instead of the specified spinach, and I think that the rougher texture of the chard worked really well, another one on the "make again" list.


Oh man oh man, this stuff is beyond good, and couldn't be easier!!  All you do is whisk 100g of sugar into 500g of greek yoghurt, tip into an ice-cream maker add a punnet of raspberries and  hay presto, fantabulous Yoghurt and Raspberry Ice-Cream.                                                                                  


Cherry Tart

Pastry

125g (4 1/2 oz)        butter, melted and cooled
90g (3 1/2 oz)          caster sugar
175g (6 oz)              plain flour
pinch salt
2 tbsp                      ground almonds

Filling

170 ml (5 1/2 fl oz)     cream
2                                eggs, lightly beaten
2 tsp                           vanilla extract
3 tbsp                         caster sugar
2 tbsp                         plain flour
550g (1lb 4 oz)           cherries, halved and pitted (Bill says fresh are best, I used frozen!!)

Preheat oven to 180 C/350 F
Grease a 24cm (9 1/2 in) round loose-bottomed tart tin.

To make the pastry, stir the butter and sugar in a large bowl.
Add the flour and salt and combine to make a soft dough.
Press this dough into the tin as evenly as possible with your fingers.
Put the tin on a baking tray and bake for 12-15 minutes, until the pastry is slightly puffy.
Remove from the oven and sprinkle with the ground almonds.

Now for the filling, whisk the cream, eggs, vanilla and sugar together.
Add the flour and mix well.
Strew the cherries, slightly overlapping over the pastry base then pour the cream filling over the cherries.

Return the tart to the oven for 40-50 minutes until the filling is firm.
Remove from the oven, and allow to cool.
Serve with cream of ice-cream.

Enjoy.